Concrete sleepers—those rugged-as-nails industrial heavy-duty blocks that hold up railways, retaining walls, and landscaping jobs—do truly last. But concrete sleepers can’t escape mother earth’s and time’s capricious ways either. In this article, we discuss three of the most common issues that are afflicting concrete sleepers: cracking, erosion, and being out of plumb. We’ll discuss why they happen, give you some doable repair techniques, and give you some advice on how to avoid future inconvenience—all with a pinch of humour to make it entertaining.
Recognising Concrete Sleepers
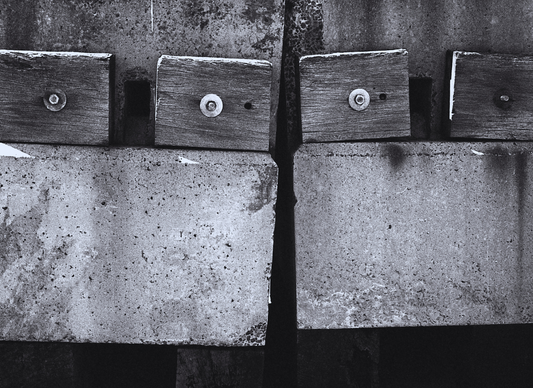
Concrete sleepers play a very significant role in structure maintenance. Although originally designed to be used on railroad tracks, they have become very popular to be used in landscaping and building retaining walls due to their strength and versatility, as well as relatively low maintenance. The instant they start to crack, deteriorate, or shift out of alignment, their impact can range from objectionable surfaces to outright structure hazards.
Prior to explaining ways to repair, it is essential to comprehend why such issues occur:
-
Shrinkage: The concrete shrinkage happens automatically as it hardens and can create hairline or more pronounced cracks due to thermal expansion and contraction, overloading, or even minor movement of the foundations.
-
Erosions: Environmental elements such as water runoff, wind, and exposure to chemicals (e.g., de-icing salts) degrade the concrete surface over time.
-
Alignment Problems: Inadequate fitting, earth movement, or constant exposure to water may cause sleepers to move out of alignment, sacrificing both appearance and stability.
Having that background information in hand, let's consider each of those issues and repairing it.
Tackling Cracks: More Than Just Cosmetic Damage
What causes cracks?
Shrinkage of concrete caused by slow evaporation of moisture.
-
Thermal Stress: Perpetual contraction and expansion of concrete caused by daily temperature variation.
-
Load Stress: Overloading, especially in railways or retaining walls, generate areas of stress.
-
Foundation Settlement: Any small displacement of supporting soil can lead to cracking over time.
Methods of crack repair
1. Clean the crack
Start by wiping off loose debris or dust that is present in the crack. Clean it thoroughly with a wire brush or with a blast of compressed air to make it free of contaminants.
2. Filling The Gap
For small, hairline cracks, fill them with a good quality concrete crack filler in a caulking tube. For deeper or more pronounced cracks, it is worth slightly opening up the crack with a chisel so that it creates a V-shaped channel. This allows the filler or repair mortar to bond better to the surrounding concrete.
3. Sealing
Following application and setting of filler, seal it with a concrete sealer. It will prevent moisture and other damages to it and extend the lifespan of the sleeper.
4. An Easy Fix-It Tip
Be creative with your crack repair with a small art project. Use a contrasting coloured sealant to create a “pattern”—as long as it is still waterproof. It's a creative way to personalise your space while waterproofing your building.
Fighting Back Against Erosion
How does erosion impact concrete sleepers?
Chemicals, water, and wind can slowly reduce the strength of concrete sleepers over time through surface degradation and pitting. Not only is visibility affected, you see; it can actually weaken the strength of the sleeper, especially if rainfall is frequent or if humidity in the air fluctuates.
Preventive measures to prevent erosion include:
1. Surface Cleaning:
Scrape off all loose concrete, algae, or dirt from the surface using a pressure washer. This will expose the actual condition of the sleeper and will help repair materials to seat more effectively.
2. Resurfacing:
Apply a concrete resurfacer—thin but very durable overlay that brings sleeper's original flat surface back to life and covers small creases or blemishes. It revitalises sleeper and has it looking like new and even.
3. Sealing The Surface:
After hardening once, resurfacing can be sealed with a good quality sealer. The sealer is a protective barrier that resists water penetration and also resists wind and chemical wear.
4. Drainage Improvements
Water areas lead you to consider putting up or enhancing drainage systems. Runoff water is important to prevent normal erosion issues.
Here's a fun fact regarding erosion:
You can see that erosion is mother nature's way of sculpting landforms. It is a painter's worst nightmare at a grand scale, but something that you do not particularly care to have in your concrete sleepers. When you stop erosion, you're not merely repairing damage—you're preserving a work of functional art!
Restoring Alignment: Restoring Order to your Structure
Causes of Misalignment
Misalignment issues in concrete sleepers usually arise due to:
-
Improper Installation: Even high-quality materials can fail when they are not installed correctly.
-
Ground movement: Ground movement or settlement may shift sleepers out of position.
-
Differences in moisture: Water can cause the ground under it to swell up or shrink due to additional moisture.
Realigning Concrete Sleepers
1. Evaluation
Begin by measuring the distance that the sleepers are out of square. Determine this with either a laser level or a spirit level.
2. Loosening the Sleepers
If it's a small shift, you can attempt to move it around by clearing out some of the debris or backfill that's around it. It can be done by hand with some help from a pry bar.
3. Reposition and stabilising
After release, reposition it to its original position. Hold it in place using shims or compact aggregate. For more pronounced movements, epoxy anchors or repair concrete adhesives can be used to offer backup supports.
4. Backfilling
Fill with compacted material so that the sleeper is firmly in place. This will stop it moving in subsequent years.
Proactive Steps to Align
The key to best practice is maintenance. Monitoring your sleepers right at the initial stage of deviation will pay you back later with lower repair expenditures. Letting it be taken care of by professionals will minimise possibilities of deviation to a large degree.
Preventing is more important than curing. Even though you must repair immediate issues to some degree, prevention is best: Check regularly to detect faults at their initial stage. Sealing is your best line of defence against moisture and erosion. Install concrete sleepers professionally to stop realignment at a later date. By doing so, you can extend your concrete sleepers considerably and keep your structures not merely safe, but also beautiful to look at.
Concluding Remarks:
Concretes do last forever, but even the best material does require some tender loving care. Whatever crack, erosion, or alignment issues your problem is, detecting such issues at an early stage can save you time, your pocket, and hassle in the long term.
Equip yourself with correct tools and techniques and with a little creative thinking you can have your concrete sleepers mint again—and even give it some character while doing that! Recall that a little maintenance will take you a long way. So take your level, your sealant, and your adventure attitude, and prepare to plug those nagging sleeper issues. Enjoy repairing!
By understanding why you do it and sticking to such maintenance and prevention methods, you can maintain your concrete sleepers as durable and reliable as possible. If you're a do-it-yourself master or will be hiring professionals to have it done, doing it now will help your investment against weather and time's destructive forces.